Cabinet Painting: Transform Your Kitchen Without the Renovation Price Tag
Cabinet painting is the ultimate kitchen makeover secret. Whether you’re tired of outdated honey oak cabinets, want to brighten a dark kitchen with fresh white paint, or simply need to update your space without the massive expense of full replacement, professional cabinet painting can completely transform your kitchen’s appearance.
But here’s what many homeowners discover too late—cabinet painting is dramatically different from painting walls. The wrong approach leads to peeling paint, brush marks, and finishes that chip with normal use, leaving you worse off than when you started.
In this detailed guide, we’re sharing professional cabinet painting techniques that deliver factory-smooth finishes and long-lasting durability. Whether you’re considering tackling this challenging project yourself or hiring experienced cabinet painters in Northern Virginia (like All American Painting Plus), these insights will help you understand what it takes to achieve stunning results.
Understanding Why Cabinet Painting Is Different
Kitchen cabinets endure more abuse than any other painted surface in your home. Daily opening and closing, cooking moisture, grease exposure, and constant cleaning mean cabinet paint must be extraordinarily durable while maintaining a flawless appearance.
The Challenge of Existing Finishes
Most kitchen cabinets have factory-applied finishes designed to resist paint adhesion:
Laminate/Thermofoil Cabinets: Smooth, non-porous surfaces that require specialized primers for proper adhesion.
Stained Wood Cabinets: Existing stain and clear coat must be properly prepared to accept new finishes.
Previously Painted Cabinets: May have multiple paint layers that need assessment for lead content and adhesion quality.
Glossy Finishes: High-gloss surfaces must be properly deglossed for new paint to adhere permanently.
Pro Tip: Cabinet painting success depends entirely on surface preparation—rushing this step guarantees failure regardless of paint quality.
Why DIY Cabinet Painting Often Fails
Cabinet painting requires specialized equipment, controlled environments, and professional techniques that most homeowners don’t possess:
- Proper spray equipment for smooth finishes
- Dust-free drying areas
- Understanding of primer and paint compatibility
- Knowledge of appropriate drying times between coats
Choose the Right Paint System for Durability
Cabinet paints must withstand daily wear while maintaining their appearance. Selecting inappropriate products leads to chipping, yellowing, and premature failure.
Understanding Cabinet Paint Options
Different paint technologies offer varying performance levels:
Hybrid Enamel Paints: Combine durability of oil-based paints with easy cleanup of latex. Excellent choice for most cabinet projects.
100% Acrylic Latex: High-quality versions offer good durability with easy application and cleanup.
Oil-Based Alkyd: Superior durability and smooth finish but requires longer drying times and proper ventilation.
Specialized Cabinet Paints: Formulated specifically for high-wear surfaces with enhanced adhesion and durability properties.
Primer Selection Is Critical
Cabinet primers must bond to existing finishes while providing optimal topcoat adhesion:
- Bonding primers for glossy or difficult surfaces
- Stain-blocking primers for wood cabinets with tannin bleeding
- High-adhesion primers for laminate and non-porous surfaces
Master Essential Preparation Techniques
Proper cabinet preparation determines whether your paint job lasts 2 years or 20 years. Every step matters for long-term success.
Systematic Cabinet Disassembly
- Remove all doors and drawer fronts with careful labeling for reassembly
- Remove all hardware, hinges, and drawer slides
- Clean all components thoroughly to remove grease and cooking residue
- Set up organized workspace for efficient processing
Surface Preparation Steps
Cleaning: Use degreasing agents to remove all cooking residue and buildup.
Sanding: Light sanding creates adhesion surface without removing material unnecessarily.
Filling: Fill hardware holes that won’t be reused and any dents or imperfections.
Priming: Apply appropriate primer to all surfaces that will receive paint.
Hardware and Hinge Considerations
Decide whether to reuse existing hardware or upgrade:
- Clean and prep existing hardware if keeping
- Plan new hardware placement if upgrading
- Consider soft-close hinges and drawer slides for improved functionality
Professional Application Techniques
How you apply cabinet paint dramatically affects both appearance and durability. Professional techniques separate amateur results from factory-quality finishes.
Spray vs. Brush Application
Spray Application: Delivers smoothest possible finish but requires proper equipment, technique, and spray environment.
High-Quality Brush and Roller: Can achieve excellent results with proper technique and premium tools.
Combination Approach: Spray doors and drawer fronts, brush cabinet boxes for optimal efficiency and quality.
Achieving Factory-Smooth Finishes
Light Sanding Between Coats: Removes any imperfections and ensures optimal adhesion.
Dust-Free Environment: Critical for smooth finishes—even tiny dust particles create texture problems.
Proper Film Thickness: Multiple thin coats outperform single thick applications.
Quality Control: Inspect each component under good lighting before final assembly.
Color Selection and Design Considerations
Cabinet color dramatically impacts your kitchen’s entire appearance. Choose colors that complement your space and personal style while considering long-term satisfaction.
Popular Cabinet Color Trends
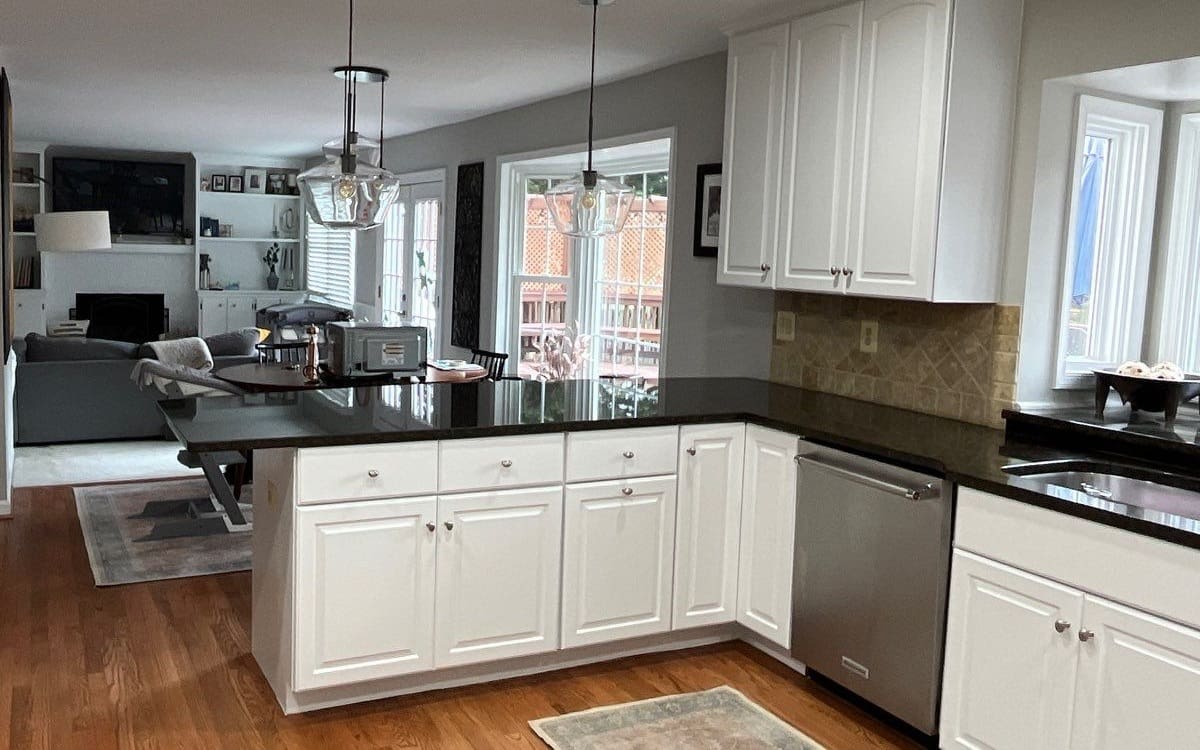
Classic White: Timeless choice that brightens kitchens and works with any decor style.
Sophisticated Grays: Modern neutral that adds elegance without overwhelming the space.
Bold Navy or Forest Green: Creates dramatic focal points while remaining sophisticated.
Two-Tone Approaches: Upper and lower cabinets in complementary colors for visual interest.
Consider Your Kitchen’s Overall Design
- Coordinate with countertops, backsplash, and flooring
- Account for natural light and room size
- Think about long-term satisfaction with bold color choices
Timeline and Process Management
Cabinet painting is a multi-day process that requires careful planning to minimize kitchen disruption.
Realistic Project Timeline
Complete Kitchen: 7-10 days from start to finish Preparation: 2-3 days for disassembly, cleaning, and prep work Painting Process: 3-5 days including drying time between coats Reassembly: 1-2 days for installation and final adjustments
Managing Kitchen Disruption
- Set up temporary food preparation area
- Plan meals that require minimal cooking
- Coordinate timeline with family schedule and special events
When Professional Results Matter Most
Cabinet painting combines the complexity of furniture finishing with the durability requirements of architectural coatings. The specialized equipment, controlled environment, and technical expertise required often make professional services the smarter investment.
That’s our expertise. At All American Painting Plus, we specialize in cabinet painting in Northern Virginia and surrounding communities, delivering factory-quality finishes that transform kitchens while maintaining functionality throughout the process.
From careful disassembly to final installation, we handle every detail—because exceptional cabinet painting requires precision at every stage.